# Upgrade Ruckus AP via SSH/FTP
Introduction
Should you have an issue upgrading a Ruckus AP's firmware via Web GUI, you can upgrade alternatively by using a combination of an SSH session and an FTP Server.
Putty - SSH Software: [https://www.chiark.greenend.org.uk/~sgtatham/putty/latest.html](https://www.chiark.greenend.org.uk/~sgtatham/putty/latest.html)
MobaXterm - FTP Software: [https://mobaxterm.mobatek.net/download-home-edition.html](https://mobaxterm.mobatek.net/download-home-edition.html)
Method (Stage 1)
Start your FTP server. For the purpose of this document, we will be using MobaXterms FTP server.
[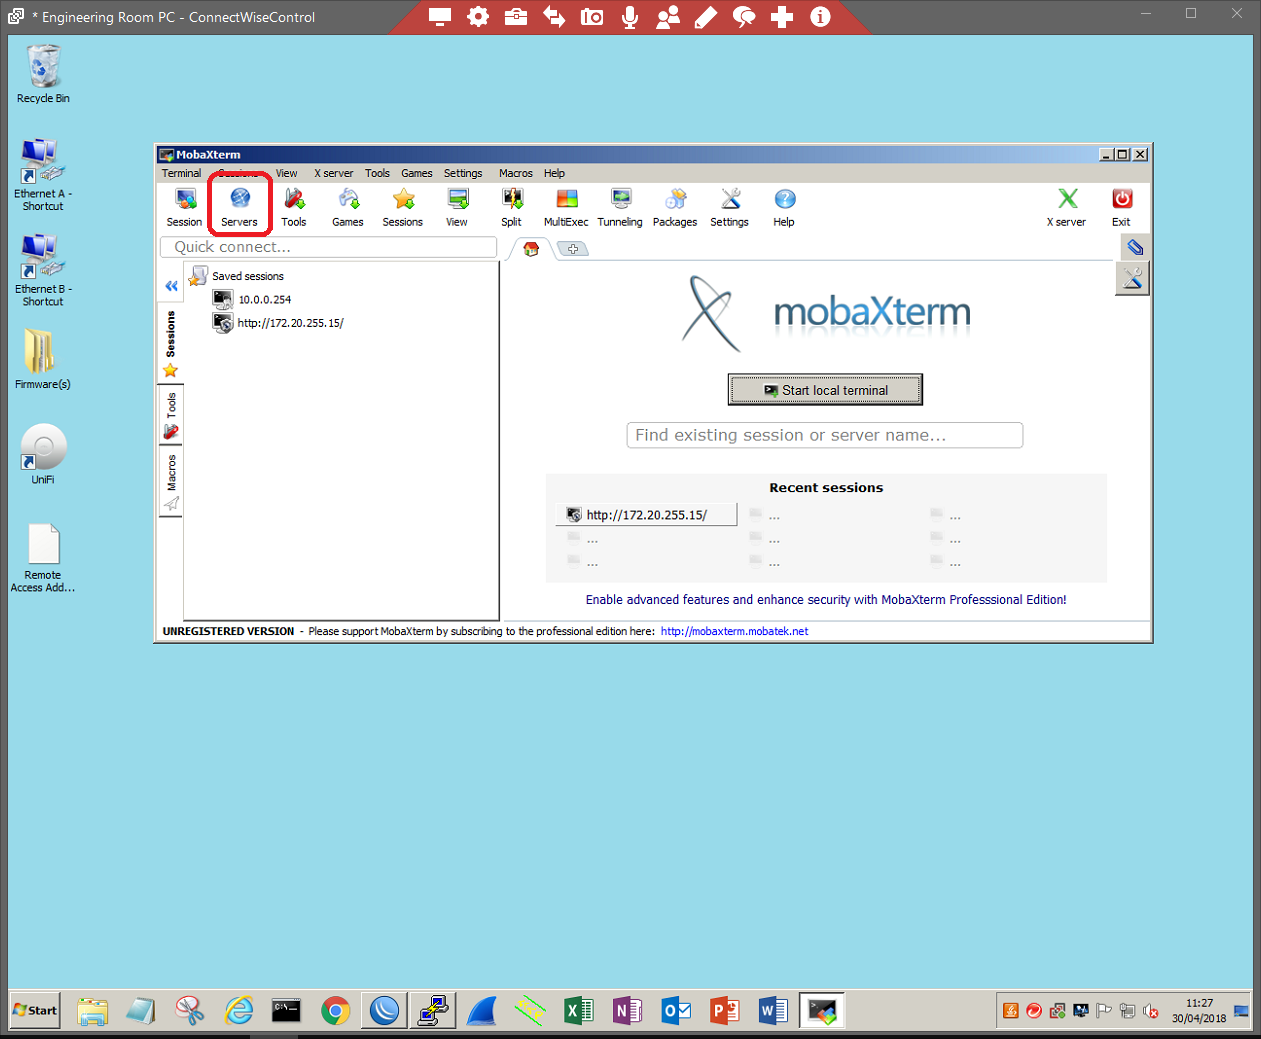](https://techblog.jcditservices.com/uploads/images/gallery/2024-08/Xdbimage.png)
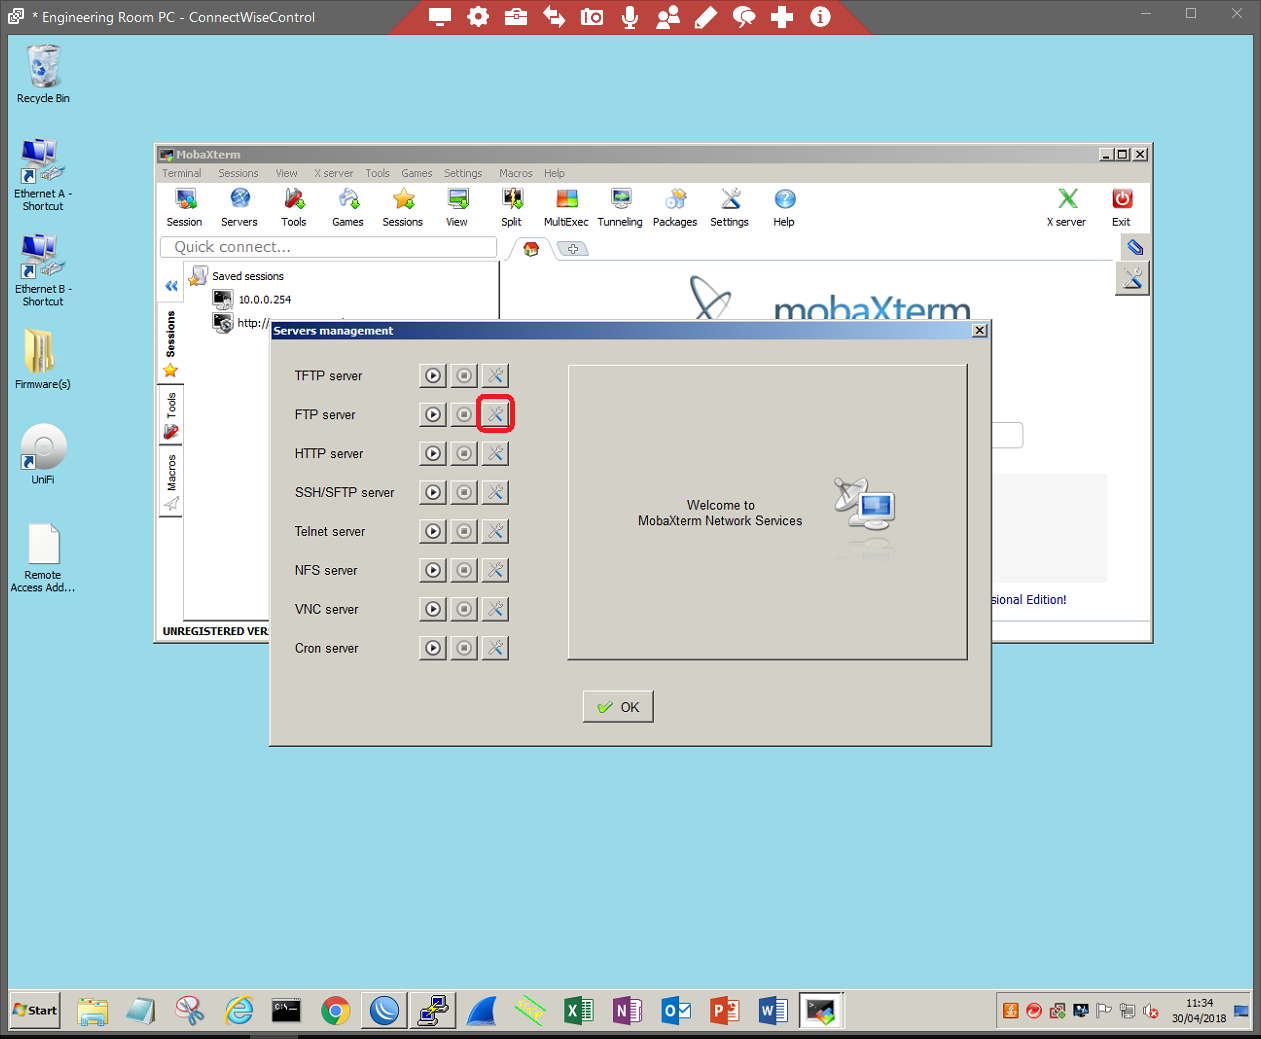
Edit the FTP server by clicking the TOOLS icon.
[](https://techblog.jcditservices.com/uploads/images/gallery/2024-08/tK6image.png)
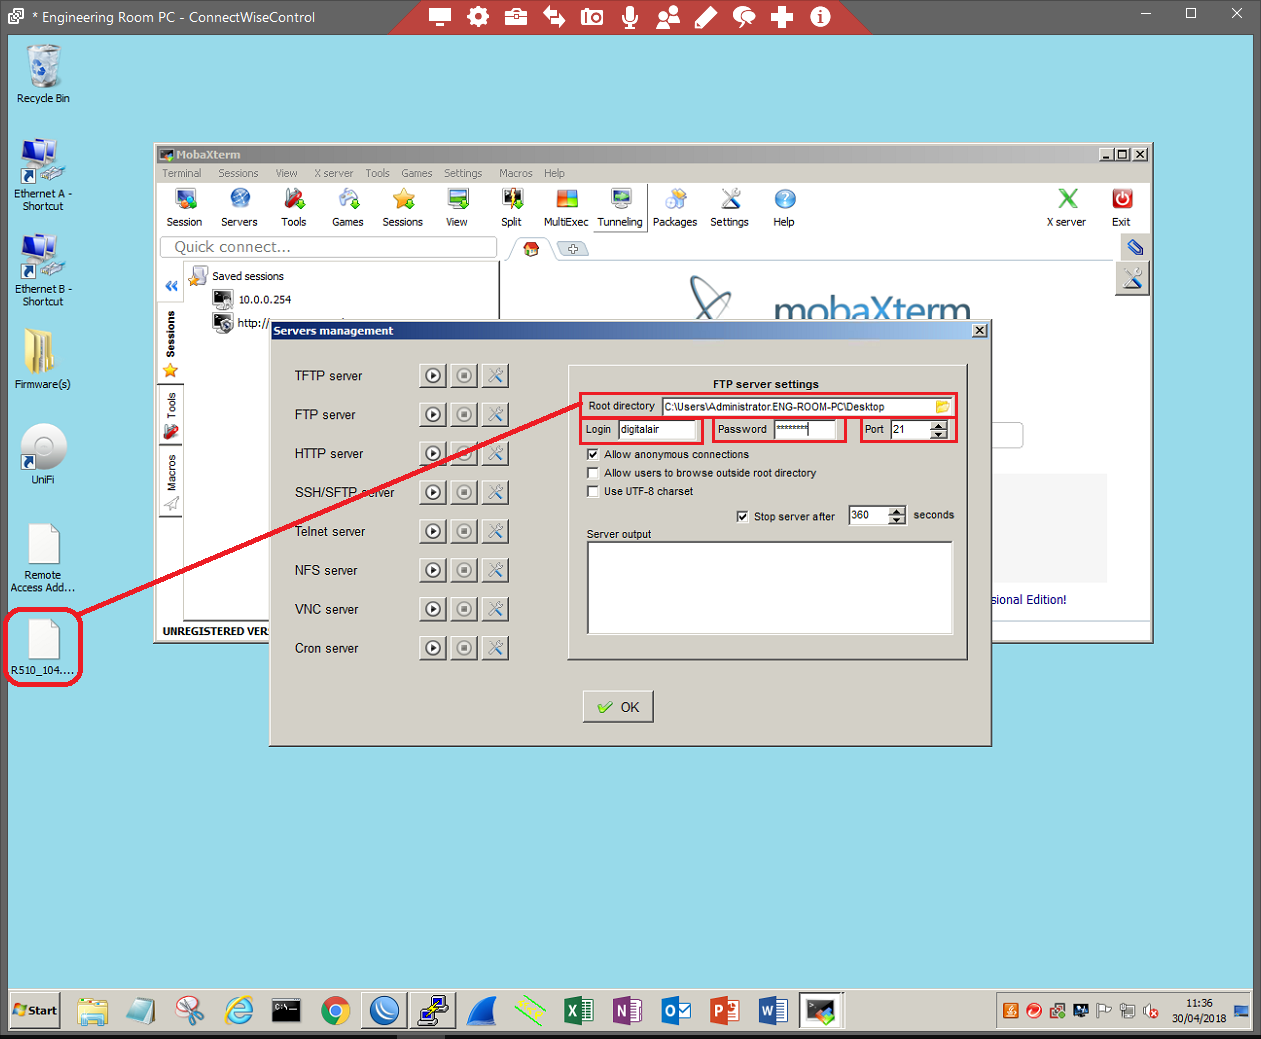
Select the location of the file (the desktop in this case), username, and password, and leave the port number as default (21). Click 'OK' to confirm the settings.
[](https://techblog.jcditservices.com/uploads/images/gallery/2024-08/WiUimage.png)
Open the server again and click the PLAY/START button to start the server.
[](https://techblog.jcditservices.com/uploads/images/gallery/2024-08/nEaimage.png)
Method (Stage 2)
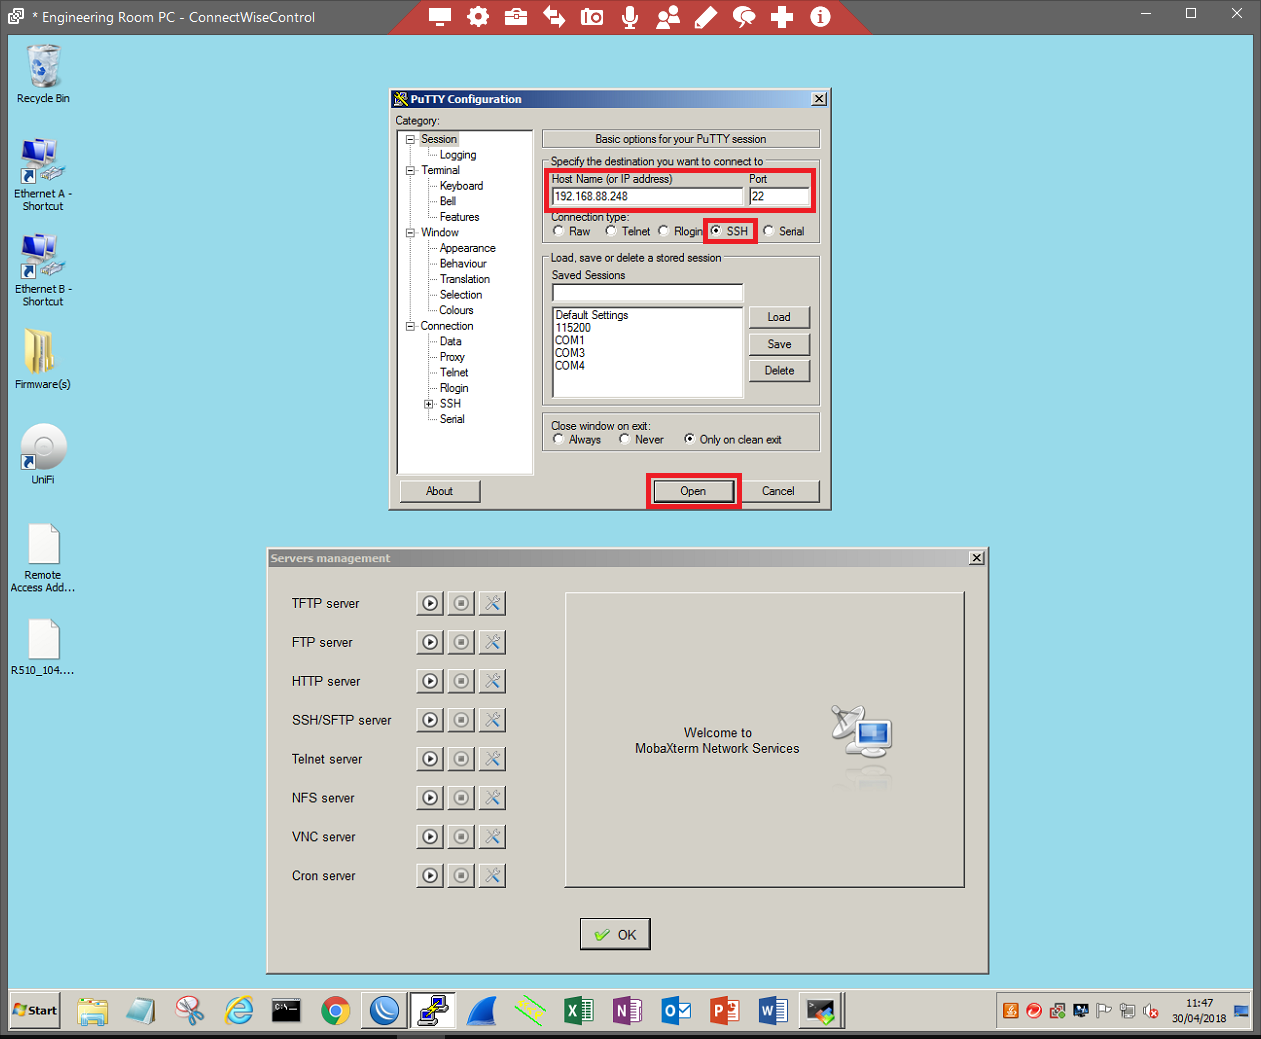
SSH into the AP using Putty. Use the IP address of the Access Point in the 'Hostname (or IP address)' section. Ensure that you are using port 22 and that SSH is selected. Click 'Open' to begin the connection.
[](https://techblog.jcditservices.com/uploads/images/gallery/2024-08/rlHimage.png)
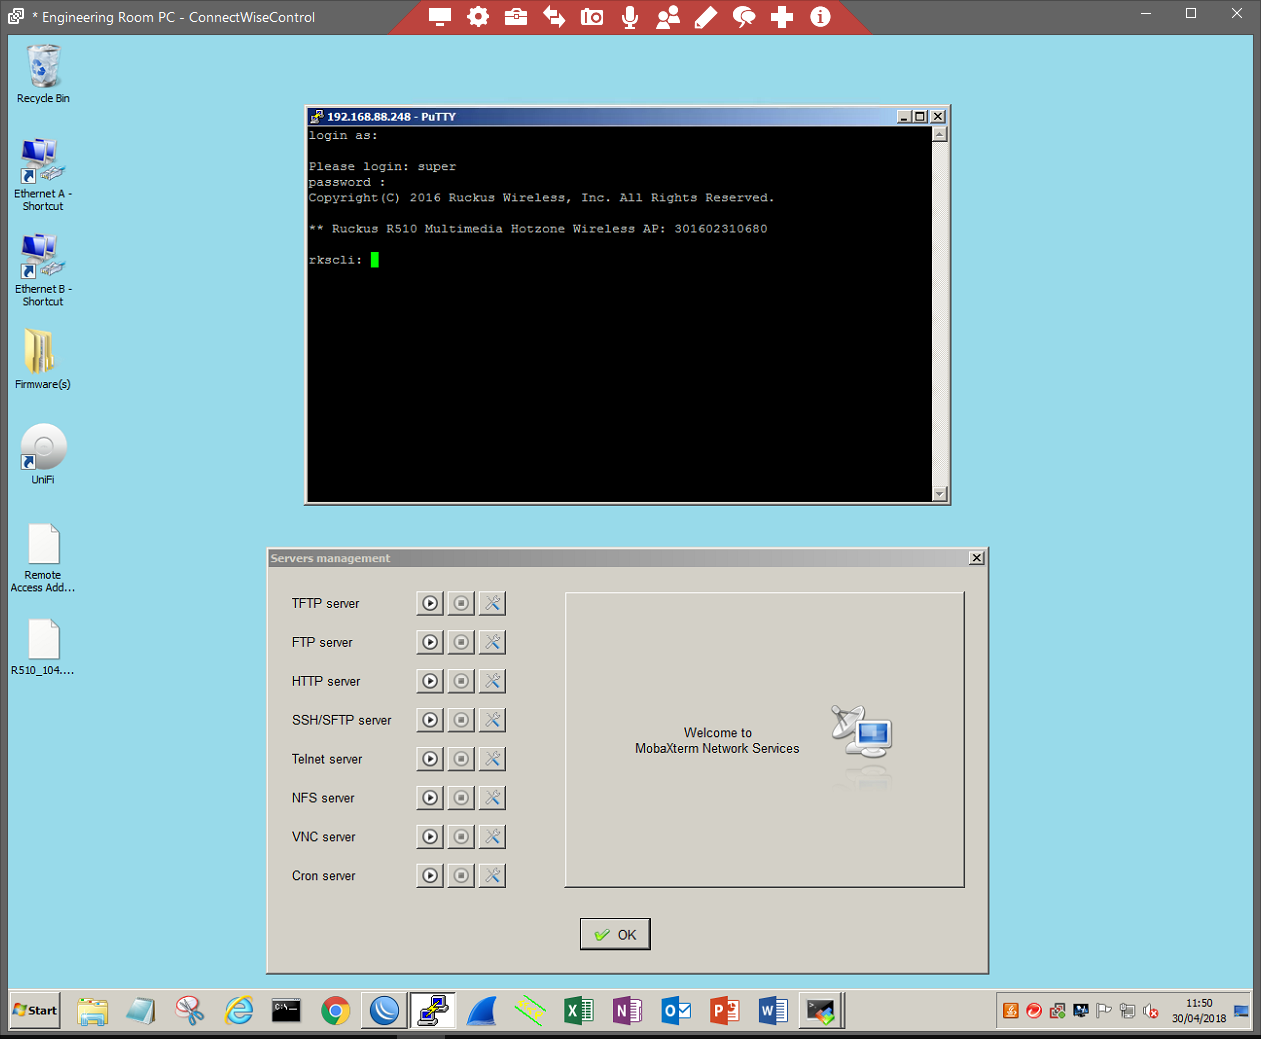
Log in with the Access Points username and password.
[](https://techblog.jcditservices.com/uploads/images/gallery/2024-08/fCdimage.png)
This will either be default or defined by the administrator. Once logged in use the following command to begin the upgrade process:
fw set control **FILENAME INCLUDING EXTENSION**
fw set proto **TRANSFER PROTOCOL METHOD**
fw set port **PORT NUMBER**
fw set host **IP ADDRESS/HOSTNAME OF FTP SERVER**
fw set user **SERVER USERNAME**
fw set password **SERVER PASSWORD**
fw up
For example;
fw set control **R510\_104.0.0.0.1347.bl7**
fw set proto **ftp**
fw set port **21**
fw set host **192.168.88.254**
fw set user **username1**
fw set password **password1**
fw up
[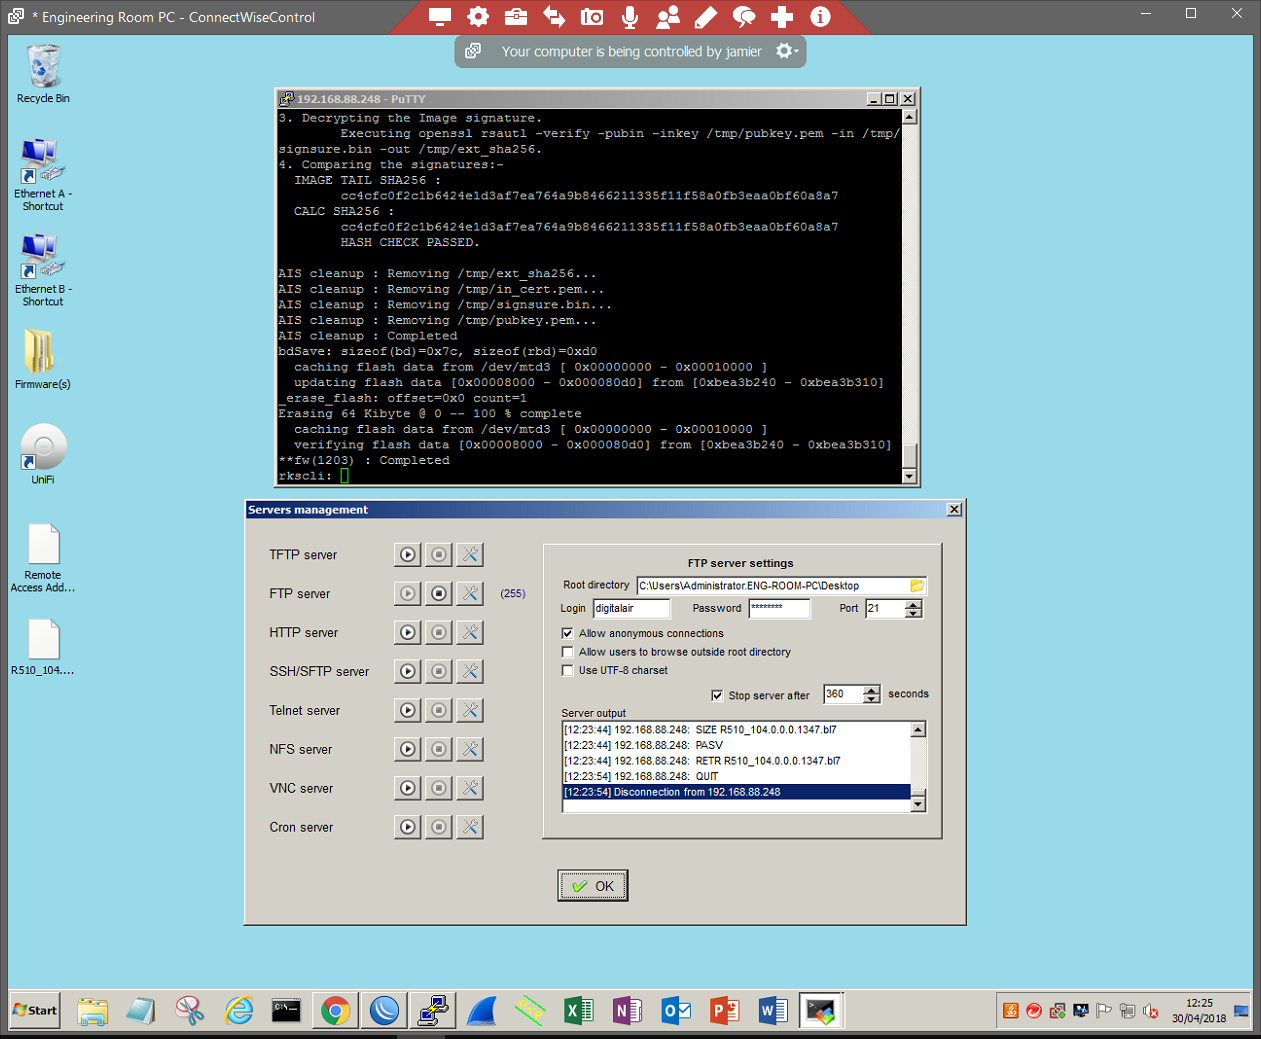](https://techblog.jcditservices.com/uploads/images/gallery/2024-08/tenimage.png)
Once successful you will receive a 'Completed' status. You **must** now reboot the AP by typing 'reboot' no quotes and pressing enter to confirm.
Once booted, confirm your work by typing 'get version' no quotes to ensure that the file is successfully uploaded/updated.