# Initial/Basic Setup of an ICX Switch
Introduction
Direct management of ICX switches can be performed either via a command-line interface (CLI) or via a web GUI. By default, only the CLI is enabled. This guide explains how to access the CLI, enable the web GUI, and secure all configuration access methods. The web GUI allows full configuration and monitoring of Layer 2 functions, QoS, ACL, authentication, PoE, performing software updates, and much more.
Introduction to the CLI
Start by powering up the switch, and connect a serial cable to the console port on the switch. Once this connection has been made to the switch, a command-line interface (CLI) session can be initiated via a terminal emulation program such as PuTTY ([www.putty.org](http://www.putty.org/)). When PuTTY is started, use the following settings depending on whether you are connecting via Telnet or a serial interface:
[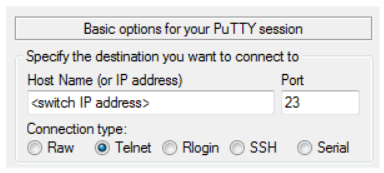](https://techblog.jcditservices.com/uploads/images/gallery/2024-08/IsGimage.png)
[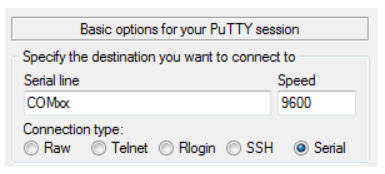](https://techblog.jcditservices.com/uploads/images/gallery/2024-08/4Keimage.png)
Once connected to the switch, the interface will present a console prompt.
Securing the Web, Serial, and Telnet Interfaces
**IMPORTANT**
As of version 80.9x the first thing you will be forced to do when you login to the switch via CLI is change the default password for the default user 'super'.
When you follow the instructions below you will reach the command line ' username <username> password <password>'
If your username differs from the default 'super' you will be creating an additional user account. With this in mind, you may want to remove the 'super' account. Particularly if you have put in a memorable/simple password in for the sake of logging into the unit (you may have put '12345678' or 'password' in to initially login).
To remove an account enter the following command at the config level:
device(config)#no user <username>
You can see what users have been created by running the following command at enable level:
device#show users
The following commands enable web access and secure the web GUI and serial interfaces with a default username and password of your choice.
**IMPORTANT**
The following commands were used on version **SPS08090k** (stable release as of August 2022). Upgrading/downgrading from the release may result in unrecognised commands.
device>enable
device#conf t
device(config)#crypto-ssl certificate generate
device(config)#aaa authentication web-server default local
device(config)#aaa authentication login default local
device(config)#enable telnet authentication
device(config)#username **XXXX **password **XXXX**
device(config)#enable super-user-password **XXXX**
device(config)#enable aaa console
device(config)#no telnet server
device(config)#web-management https
device(config)#no user super
device(config)#wr me
The password can be changed by repeating the username <username> password <password> command or via the web interface under Configure > System > Management > User Account.
Cut and paste the following command set at the user EXEC prompt to apply the complete configuration outlined above and set a default username of **super** with a password of **sp-admin** and an enable password of **password**
**enable**
**conf t**
**crypto-ssl certificate generate**
**aaa authentication web-server default local**
**aaa authentication login default local**
**enable telnet authentication**
**username super password sp-admin**
**enable super-user-password password**
**enable aaa console**
**no telnet server**
**web-management https**
**no user super**
**wr me**
Access to the web interface is now possible, and all access methods are protected by a username and password.
**IMPORTANT**
To ensure that your switches are secure from unauthorized access, always set a secure password. Never leave a switch with the default brocade/brocade or super/sp-admin settings provided above.
Accessing the Web Interface
To access the device by web interface simply browse to the dynamic IP the switch obtains (by default the switch is DHCP) or add a static IP address to the device**.** For example, if you wanted to access the switch based on a static IP address of 192.168.2.100/24 and a gateway address of 192.168.2.1 you would need to do the following;
device> enable
device# conf t
device(config)# ip address 192.168.2.100 255.255.255.0
device(config)# ip default-gateway 192.168.2.1
device(config)# wr mem
device(config)# exit
device#
You should now be able to browse to 192.168.2.100 via a web browser.