# Creating an Option 43 Entry - Ruckus
Introduction
This option is used by clients and servers to exchange vendor-specific information. Servers that are not equipped to interpret the information ignore it. Clients that expect but don't receive the information attempt to operate without it.
Option 43 can be especially helpful for pointing Ruckus access points to controller (ZoneDirector or SCG/SZ). The resolution to configure Option 43 is explained below.
Method - Obtaining your Value
You will need to know the following prefix both ZoneDirector(s) and SmartCell Gateway/SmartZone(s).
- Zone Director: 0x30c
- SCG/SZ: 0x60c or 0x60f
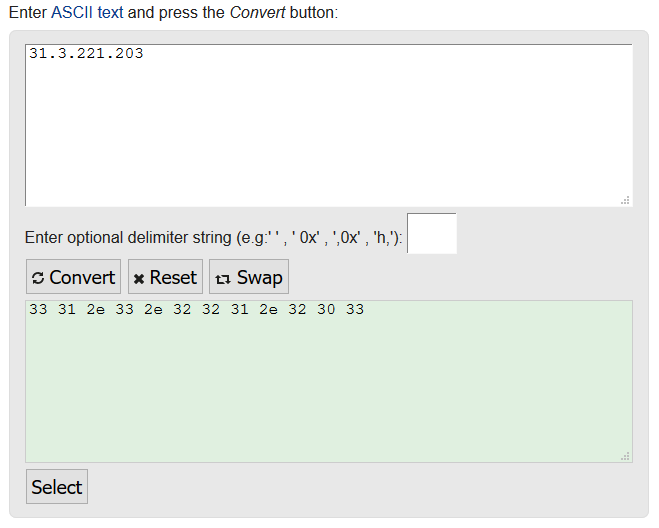
You will also need to convert the ASCII text of your controller IP address to HEX. I use the following site for converting but feel free to use whichever you like.
- [https://www.rapidtables.com/convert/number/ascii-to-hex.html](https://www.rapidtables.com/convert/number/ascii-to-hex.html)
An example of the HEX converter:
[](https://techblog.jcditservices.com/uploads/images/gallery/2024-08/bKTimage.png)
Putting these together will give you your 'value'. For example:
To point a Ruckus AP to a SCG/SZ to example IP 31.3.221.203 would be: 0x60c + 33312e332e3232312e323033 = **0x60c33312e332e3232312e32303**
To point a Ruckus AP to a ZD to IP 192.168.1.1 would be: 0x30c + 3139322e3136382e312e31 = **0x30c3139322e3136382e312e31**
Method - Setting this in the MikroTik
For the purpose of this article I will assume you have a minimal/basic understanding of the device and know how to login to the MikroTik device.
Open your MikroTik router in Winbox or Webfig. Browse to: **IP** > **DHCP Server** > **Options** > Click the blue '**+**' to create a new profile
Provide the following:
- Name: Defined by yourself
- Code: This MUST be 43
- Value: Defined by your obtained value
Click 'Apply' and then 'OK'.
This then needs to be applied too your network address. To do this go to: **IP** > **DHCP Server** > **Networks** > Double click the network required (the ones which your AP's will be on) > On **DHCP Options** click the dropdown and select the profile.
Any AP's now connected to this network should be pointed towards the controller, and appear in their Staging Zone or on the ZD pending any auto provision rules setup on the controller.